
TwitThis is again a simple social networking site which displays Twitter Messages about your posts. In fact it seems an easy way for people to send Twitter messages about your blog post or website with this type of mediator tools.Below here you will get step by step tutorial to add TwitThis Button In each of your Blogspot posts. This Button can be used by any blogger user.
TwitThis is again a simple social networking site which displays Twitter Messages about your posts. In fact it seems an easy way for people to send Twitter messages about your blog post or website with this type of mediator tools.Below here you will get step by step tutorial to add TwitThis Button In each of your Blogspot posts. This Button can be used by any blogger user.


Don't Change the code seen above, paste it exactly look like now.
Twit This!
If you like my TwitThis link ( ), add this class in your CSS file and use it in the previous link:
.share-twitthis{
background:url(http://tinyurl.com/ay2jsc) 10px top no-repeat;
padding-left:42px;
font-size:11px;
line-height:18px;
}
It's Done !! Please Post Comments if you have any doubt or any suggestion, you simply can share your views.
So many bloggers are running blogs with different niche worldwide now a days with feedburner email subscription services. if you are a webmaster and a blogger you might have used feedburner for sending regular updates to your blog readers via email subscription. This article is about changing the feedburner email subscritption mailing preferences, after reading this article you will be able to change the Email Subject/Title, you can select your current timezone to customize email delivery to your readership's local and set the time of sending mail to the readers, you can attach your blog logo in email and customize html details etc..
How to change subject of feedburner email feed?
1. Log in to http://feedburner.google.com/.
2. Select your feed for which you need to change the settings and Click on Publicize tab.
3. Click on Email Branding.
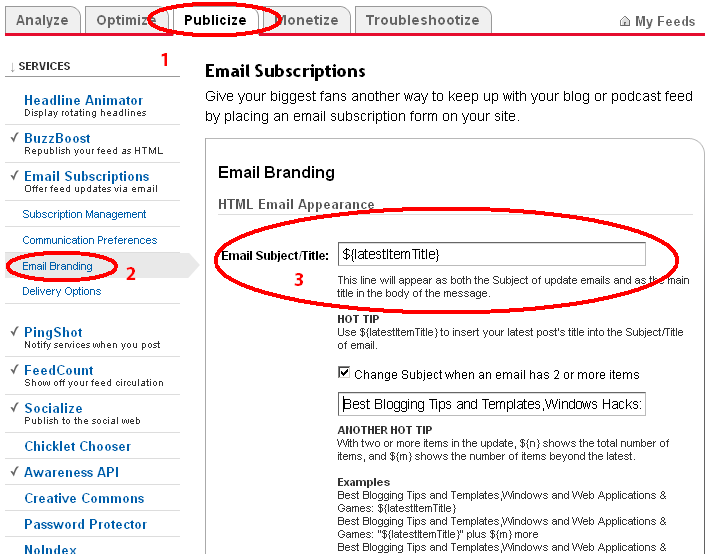
4. Change Email Subject/Title to ${latestItemTitle}.This will set name of post as subject in email.
5. If you have posted more than one post in a day then check the box saying Change subject when an email has 2 or more items.
6. Now if you want to send your blog logo to subscribers through mail, prepare a 200*200 Logo and put Logo URL in the text box. you can change HTML and customize your feed details accordingly.
 7. Now if you need to change the time frame for sending the mail to the subscribers. just navigate to thePublicize > Delivery Options.
 8. Change the timezone and schedule email delivery and done.
Almost every blogger is using RSS Feed Subscription widget to create a powerful way of communicate with the blog readers. This article is on blogger widget and this widget is "subscribe to our rss feed widget". This RSS widget is something special then the ordinary widgets, because it uses jQuery Popup Bubble.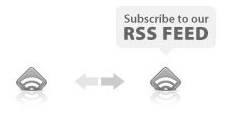
With this widget you can ceate a jQuery Popup Bubble rss subscription icon which will help you to increase your blogs look and feel.
If you are eager to add this widget in your blog then you must ask a question here about how to add a cool popup bubble to an RSS feed link using jQuery to my blgo?. Answer is very simple - with little bit of JavaScript, HTML and CSS code.
See the working demo RSS Feed Subcription Widget For Blogger or Demo.
Thanks to Digital Vision Team for making this RSS Subscription widget.
Steps to add Bubble RSS Feed Subcription Widget in your Blog:
1. Add JavaScript code:
Log in to Your Blogger Account
On Your Dashboard, Click on Layout (see the image below)
Now Click on HTML (see below shown picture for further assistance)
Find this code
and replace it with this code
2. Add CSS Code: Now find the code ]]> and replace it with the code given below.
.rss-popup {
margin: 100px auto;
padding: 0;
width: 100px;
position: relative;
}
div.rss-popup em {
background: url(https://blogger.googleusercontent.com/img/b/R29vZ2xl/AVvXsEjLFWMWNOROgH5LwfeIg8EOqC6ybnEmdnfWn0EZ66-kferUvUIVlqNgGkW-EyxukvE5RWNklR8U2YTSedx-eBFue4cRWDuj8LwGbMh43r66MHHGpm2MnHg4T-lig1p-Jdo8Pan7tAO8rd0/s400/bubble.png) no-repeat;
width: 100px;
height: 49px;
position: absolute;
top: -70px;
left: -0px;
text-align: center;
text-indent: -9999px;
z-index: 2;
display: none;
}
#rss-icon {
width: 42px;
height: 42px;
background: url(https://blogger.googleusercontent.com/img/b/R29vZ2xl/AVvXsEiWhfTSJMjbBTRhOg1sxgpNOSCQtVJUJAW3VuMDTYlzzPrEvOyhow5a9vOCeIbVqYOkofBjUcDc2cgYKpUxLapiTScDitH20ocMGlNR1B0ZZTykOZbA2-78D5Kl80-Ox0NZbzNuY05fWYE/s400/icon.png) no-repeat 0 0;
text-indent: -9999px;
margin: 0 auto;
display: block;
}
]]>
3. Add HTML Code:
Step 1. Go to your blogger dashboard and select the blog in which you want to add drop down menu.
Step 2. Navigate to the Layout > Page Elements.

Step 3. Now click on Add a Gadget where you want to put this RSS Subscription widget in your blog and paste the code given below (Change the feed-link with your rss feed address) and click on save button.
Now you can see your cool bubble RSS feed subcription widget ready for the bloggers.
Give feedback on this article and post your doubts. Happy blogging :)
Share your Facebook information on other websites. If you are a facebook user and running any blog as well, here is a tip for you to add your facebook profile badge on your blog like blogger, wordpress, Typepad and others as well.There are so many friends of mine are asking me questions like.
How to get profile badge from Facebook?
How to create Facebook profile badge?
How to include Facebook profile on website?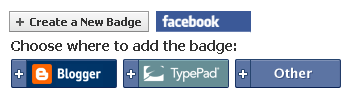
Excerpt: "To create a badge, just click on the "Create a Profile Badge" link at the bottom of your profile page. This will take you to your Facebook Badge page. On this page, select the "Create Badge" option. You will be walked through the creation process".
So now to add the facebook profile badge on your blog or website you need to follow the steps given below.
First, go to your Facebook account and log in. Then head on to your profile page, by clicking on your name or "Profile" on the top navigation bar.
Then on the left sidebar, scroll down until you see "Create a Profile Badge", something like this.
Select the layout and the information (items) you would like to display.
And then click save.
After that, select the code, copy and paste it to your blog as one of the page gadget on the layout settings page.
That's all about profile badge, now you can make photo badges and fan badges also with ease.


If you have already a domain name and want to use that domain name with blogger then this article will help you to define the prerequisites and hence you will be able to set the custom domain name with your blogger account.
This is as simple as hosting your blog within blogger but without .blogspot domain.
example: http://www.geekblogger.org, yes correct my blog is hosted in blogger :).
1) If you don't have any domain already then Choose and Register Your Domain.
The first thing you'll need to do is to choose a domain name, like example.com and register it. You can register domain names from any of a number of different registrars, and you can use .com, .org, .net or any other valid addresses. Remember: you only need to get the domain name; you don't have to pay extra for hosting service. The easiest way to register a domain is to buy your domain directly through Blogger. If you go this route, we'll automatically configure all of your relevant DNS settings and attach your new domain to your existing blog immediately.
Update the DNS Settings:
DNS stands for Domain Name System, and a DNS server determines what site a given address takes you to. So far, you have a domain name but none of the servers on the internet know what to do with it yet. To take care of this, you need to do two things:
Create a CNAME record for your blog's address, which should be a subdomain of the form www.example.com.
To create a CNAME record for your domain with the DNS, associating your domain with:
ghs.google.com.
The exact procedure for doing this varies depending on your domain registrar, but you can find instructions for many common registrars here. If yours isn't listed, or if you run into other difficulties, you can contact your registrar directly and they'll be able to help you out.
Create 'A' NAME records for your naked domain (blog.com)
Note: The following information applies to naked domains only!! If you're setting up a subdomain then this does NOT apply to you! :-)
Creating A records for your naked domain is important as it allows Google to redirect people who use in your naked domain name (blog.com) to your blog page (www.example.com). If you do not do this, visitors who leave off the www will see an error page.
There are four separate A records you will create, and can be done from the same control panel you accessed your CNAME records. Simply point your naked domain (example.com, without the 'www') to each of the following IP addresses:
216.239.32.21
216.239.34.21
216.239.36.21
216.239.38.21
Your DNS setup is now complete!
Update Your Blogger Settings
Almost done! At this point, you have a domain name, and the DNS servers know to direct people to Google when they want to see your blog. But Google hosts lots of blogs, so we have to make sure the right one is associated with this domain. You'll do this on the Settings | Publishing tab for your blog in Blogger.
If you're publishing on Blog*Spot, you'll see a link near the top offering to switch you to a custom domain. Go ahead and click that link.
The Blog*Spot Address setting now changes to Your Domain. Fill in the domain you registered, and then save your settings.
Now the only thing left to do is to tell everybody about your new address!
Notes:
If your new domain isn't taking you to your blog, wait another day or two to make sure all the DNS servers have been updated. If it still isn't working, contact your registrar to make sure you entered the DNS settings correctly.
Your original Blog*Spot address will automatically forward to your new domain. That way, any existing links or bookmarks to your site will still work.
You can use this feature with domains (e.g. example.com) or subdomains (e.g. ). However, you cannot specify subdirectories (e.g. example.com/blog/) or wildcards (e.g. *.example.com).
Your posted images will continue to display on your blog as described here.
After making the changes check who.is, and your ANAME and CNAME records should be display something like given below here.
You can get the errors given in below screen shot during the setting of custom domain with your blogger account.
1) Another blog is already hosted at this address.
2) Blogs many not be hosted at naked domains.
What is a naked domain?
A naked domain is simply a domain name without the 'www' prefix. For example, google.com (naked) instead of www.google.com(non-naked.) To fix this, simply enter the non-naked (means add www before domain name) version of your domain and save your settings.
Solution:
1) solution of the problem 1 is that you might have already hosted blog some where else, wait 24 hours after changing the ANAME and CNAME records.
2) solution for problem 2 is just add the www as prefix against your domain name.
That's all you need to do for running your custom domain blog withing blogger.
Let me know if you have any doubt or query :)

